HomeLab VR

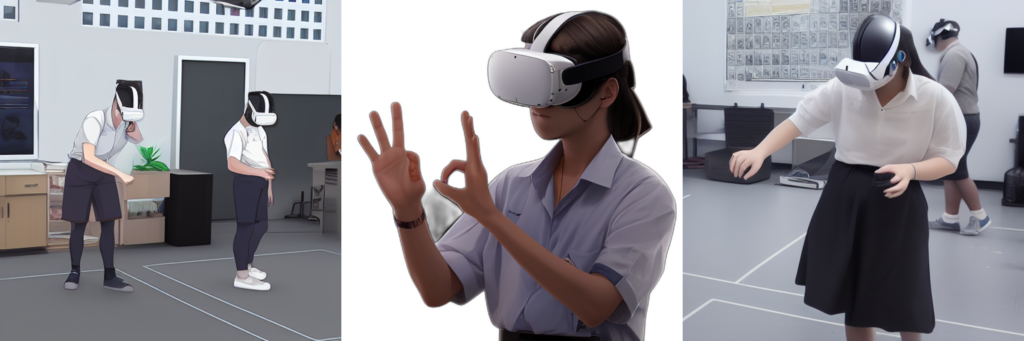
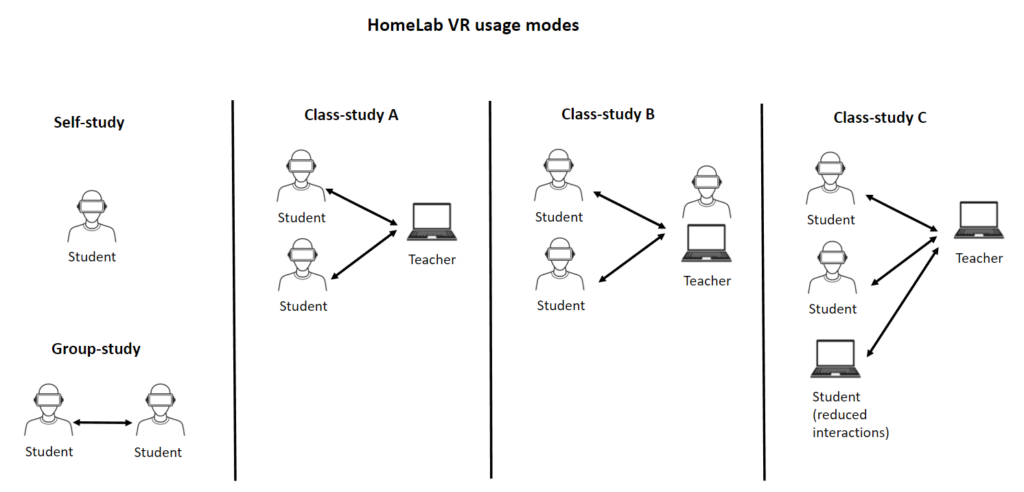
HomeLab VR is a virtual reality (VR) representation of a high school level chemical laboratory environment. The user is able to conduct a defined number of experiments in said environment without the need of having real equipment or actual danger and harm to themselves or others. Virtual reality in this context means a real-time 3D environment inside a 6 degree of freedom head-mounted display that the user can interact with.

The purpose of HomeLab VR is to educate students that could otherwise not be able to access a fully equipped chemical laboratory in chemistry and the handling of laboratory equipment. This is achieved by using consumer grade stand-alone VR headsets that are cheap and relatively easy to purchase.

HomeLab VR user modes

The goal of HomeLab VR is to allow users to experience a high school leven chemical laboratory in a virtual environment. For users to be able to use the virtual lab, it is required to have at least one Meta Quest 2 headset.

The users have different methods of learning with HomeLab VR.

1. The users can study in HomeLab VR by themselves. For this they can run HomeLab VR stand-alone from inside the headset.

2. Users can study together with both users in VR. Both users need to use a Quest 2 headset for this.

3. In a class environment, students can use the headset while the teacher is using a notebook.

4. The teacher can join the students in VR as well. The notebook is used to enable others to view what is happening in VR

5. Others can use a notebook to join the virtual lab and to see how the experiment is progressing.

The list of experiments and their explanation can be found under the experiments section in the top navigation bar. Currently the experiments are designed with Thai speaking students in mind. Further languages will follow at a later point in time.

HomeLab VR system in a box

We created the HomeLab VR system in a box to provide a learning system that contains everything required to use HomeLab VR

The systems is inside a transport case. Inside are 2 Meta Quest 2 headsets, 1 Notebook, 1 Wi-Fi router, and 1 electric power strip plus accesories

 If you are interested to run HomeLab VR with your own notebook and Meta Quest 2 headset, please contact us and we will provide the required files and instructions on how to set it up to you.

HomeLab VR unbox

There are 3 layers inside the HomeLab VR box.

1. The first layer or the top layer is composed of 1 internet router, 1 mouse, 1 ethernet cable and 1 notebook charger.

2. The second layer or the middle layer is composed of 1 electrical power strip, 1 router power adapter, and 1 overvoltage circuit protection (if local power is unstable).

3. The third layer or the bottom layer is composed of 2 Meta Quest 2 boxes, and 1 notebook. Each Meta Quest 2 box contains 1 Quest 2 headset, 1 charging cable with charger, 1 optical frame for who wearing glasses and 2 Quest 2 controllers (left and right)

Setting up HomeLab VR

1. Plug in the power adapter into the Wi-Fi router and switch it on. Blue lights at the router indicate that it is powered on.

2. Turn on the notebook and connect it with the provided Wi-Fi router. The SSID of the network is “HomelabVR_5G”.

3. Double-click the shortcut icon for HomeLab VR on the desktop and HomeLab VR will start. The username is pre-filled as Teacher/Kru, but can be changed.

4. Take the VR headset out of the box and adjust the optical lenses to match your IPD. Adapt from widest to narrowest. The widest selection is indicated by the number 3. The middle selection (2) is appropriate for most users. The narrowest selection (1) puts the lenses furthest to the middle.

5. Adjust the headset with the vertical and horizontal straps to give you the most comfort.

6. Switch on the headset and create a guardian (virtual fence). For your own safety, please ensure that there are no objects in your space.

7. Once inside VR, wait for the system menu to appear. Then select App Library, filter for “unknown sources” and then select “HomeLab VR”. Once Homelab VR is started, you have the choice of either openening your own Lab or joining an existing Lab.

8. Once you are finished with “HomeLab VR”, open the Quest System Menu and quit the software

9. When finished using the Meta Quest 2, press the button on the right hand side, wait for the shutdown menu to appear and select shutdown

“HomeLab VR” running on the notebook can be exited by clicking the exit button on the lower right. Once in the main menu, just click the “X” button on the upper right.

Caution

To avoid damaging your lenses and display, keep your headset away from anywhere that it might get exposed to the sun. To keep your Meta Quest headset safe from sun exposure, follow these tips:

  • Don’t store or leave your headset anywhere where it can be exposed to sunlight. The lenses inside your headset can be permanently damaged from less than a minute of exposure to direct sunlight even if it’s indoors.
  • Do not use your headset outdoors.
  • If you need to transport your headset, do so in a bag or case that keeps it safe and protected from direct sunlight.

Experiments

Experiment 1 Separation of benzoic acid-bentonite mixes

Experiment 2 Flame tests

Experiment 3 Synthesis and empirical formula of Magnesium oxide

Experiment 4 Heat of reaction

Experiment 5 Molecular weight determination by increasing of the boiling point

Experiment 6 The reaction of Iron metal and Copper(II) sulfate solution

Experiment 7 Determining molar volume of a gas at standard temperature and pressure

Experiment 8 Effect of concentration on rate of reaction

Experiment 9 Reversible reaction and chemical equilibrium

Experiment 10 Acid-base indicator

Experiment 11 Acid-base titration

Experiment 12 Galvanic cell

Experiment 13 Determination of Sulphate by gravimetric method

Experiment 14 Preparation of solutions and standardization of HCl

Experiment 15 Dissolved oxygen: DO